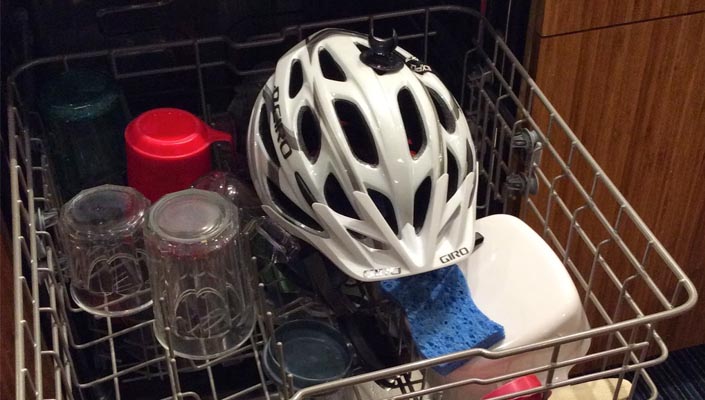
To clean a bicycle helmet, remove the padding and wash it with mild soap and water. Wipe the helmet shell with a damp cloth.
A clean bicycle helmet ensures both safety and comfort. Over time, sweat, dirt, and grime accumulate, affecting its efficiency. Regular cleaning not only extends the helmet’s life but also maintains its protective features. Use mild soap to avoid damaging the materials, ensuring the helmet remains intact.
Avoid harsh chemicals as they can weaken the helmet structure. Proper maintenance involves drying the helmet completely to prevent mold growth. Always check the manufacturer’s instructions for specific cleaning guidelines. By following these steps, you keep your helmet in top condition, ready for every ride.
Importance Of Cleaning
Cleaning your bicycle helmet is crucial for both safety and hygiene. A clean helmet not only protects your head but also ensures a comfortable ride. Regular maintenance prolongs the life of your helmet, saving you money in the long run. Let’s delve into the specific reasons why cleaning is essential.
Safety And Hygiene
A clean helmet ensures your safety by maintaining its structural integrity. Dirt and grime can weaken the helmet’s material, making it less effective. Sweat and oils from your hair can also degrade the padding inside, reducing comfort and protection.
Hygiene is another key factor. Helmets can become breeding grounds for bacteria and fungi. This can lead to skin irritations and unpleasant odors. A clean helmet reduces the risk of infections and keeps you feeling fresh.
Prolonging Helmet Life
Regular cleaning helps prolong the life of your helmet. Dirt and sweat can cause wear and tear on the straps and buckles. Keeping these components clean ensures they function properly for a longer time.
By removing dirt and grime, you also prevent material degradation. This keeps the helmet in good shape, ensuring it can protect you effectively. A well-maintained helmet lasts longer, giving you more value for your investment.
| Benefits of Cleaning | Impact |
|---|---|
| Improved Safety | Maintains structural integrity |
| Better Hygiene | Reduces bacteria and odors |
| Prolonged Helmet Life | Prevents wear and tear |
| Cost Savings | Extends helmet lifespan |
- Improved Safety: Keeps helmet strong and effective.
- Better Hygiene: Reduces risk of skin issues.
- Prolonged Helmet Life: Saves money over time.
- Cost Savings: Less frequent replacements needed.
Materials Needed
Cleaning your bicycle helmet is essential. It ensures your safety and hygiene. To start, gather all necessary materials. This guide will list them under two categories: cleaning supplies and protective gear.
Cleaning Supplies
To clean your bicycle helmet, you will need the following supplies:
- Warm Water – Helps loosen dirt and grime.
- Mild Soap – Gentle on helmet materials.
- Soft Brush – Prevents scratches on the helmet.
- Microfiber Cloth – For drying and polishing.
- White Vinegar – Removes odors and disinfects.
Protective Gear
While cleaning, protect yourself with these items:
- Gloves – Keep your hands clean and safe from soap.
- Goggles – Shield your eyes from splashes.
- Apron – Protects your clothes from dirt and water.
| Item | Purpose |
|---|---|
| Warm Water | Loosen dirt and grime |
| Mild Soap | Gentle cleaning |
| Soft Brush | Scrub without scratching |
| Microfiber Cloth | Dry and polish |
| White Vinegar | Disinfect and remove odors |
| Gloves | Protect hands |
| Goggles | Shield eyes |
| Apron | Protect clothes |
Preparation Steps
Before you dive into cleaning your bicycle helmet, it’s crucial to prepare. Proper preparation ensures a thorough and effective cleaning process. Follow these steps to get your helmet ready for a good scrub.
Inspect The Helmet
Start by inspecting your helmet for any visible damage. Look for cracks, dents, or broken straps. If you notice significant damage, consider replacing the helmet. Safety first!
Check the interior padding and straps. Make sure they are intact and not worn out. Clean padding and straps mean better comfort and protection.
Remove Accessories
Next, remove any accessories attached to your helmet. This includes visors, lights, and cameras. Removing these items makes cleaning easier and more effective.
Place the accessories in a safe spot. You don’t want to lose any parts during the cleaning process.
Once you’ve completed these preparation steps, your helmet will be ready for a thorough cleaning. Stay tuned for our next section on how to clean the helmet effectively!

Credit: www.cyclist.co.uk
Cleaning The Exterior
Keeping your bicycle helmet clean is important for safety and hygiene. The exterior of your helmet can gather dirt, sweat, and grime. Cleaning it regularly will keep it looking new and fresh. Follow these steps for a thorough clean.
Washing The Shell
To wash the shell, start by removing any loose dirt. Use a soft brush or cloth. This will make the washing process easier. Fill a bucket with warm water and mild soap. Avoid harsh chemicals as they can damage the helmet.
Dip a sponge or cloth into the soapy water. Gently scrub the helmet’s surface. Focus on areas with visible dirt. Rinse the helmet with clean water. Make sure no soap residue is left. Pat the helmet dry with a soft towel. Allow it to air dry completely before using it again.
Removing Stubborn Dirt
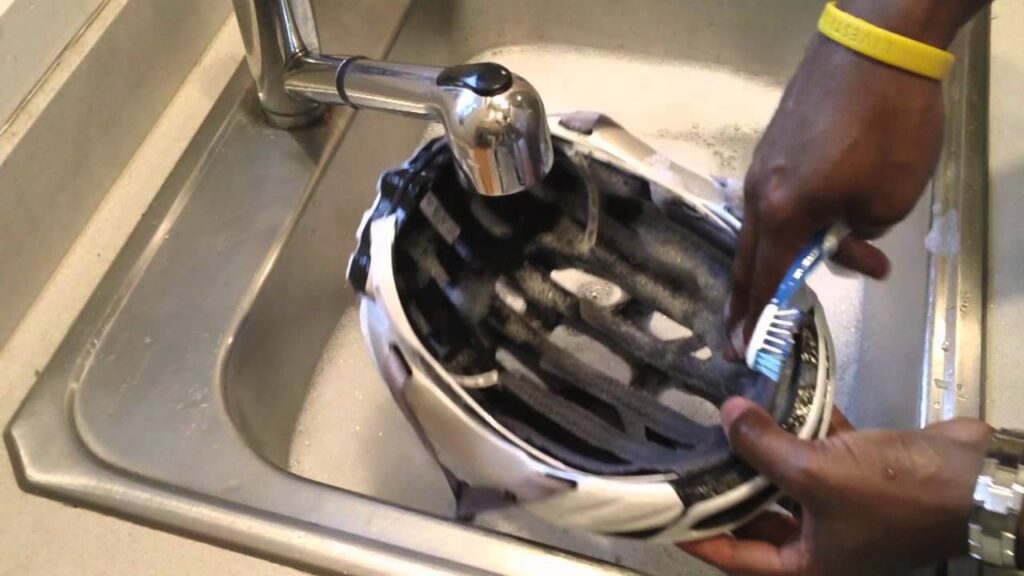
Sometimes, dirt can be stubborn and won’t come off easily. For these tough spots, you can use a toothbrush. Dip the toothbrush in soapy water. Scrub the dirty areas gently. This will help remove the dirt without damaging the helmet.
If the dirt is still not coming off, you can use a mixture of baking soda and water. Make a paste and apply it to the dirty spots. Let it sit for a few minutes. Scrub again with the toothbrush. Rinse off the paste with clean water.
Here’s a quick reference table for cleaning supplies:
| Item | Use |
|---|---|
| Soft Brush/Cloth | Remove loose dirt |
| Warm Water & Mild Soap | Clean the shell |
| Toothbrush | Scrub stubborn dirt |
| Baking Soda | Remove tough stains |
By following these steps, your helmet will stay clean and last longer. Remember to clean it regularly to keep it in good condition.
Cleaning The Interior
Maintaining a clean bicycle helmet is essential for your safety and hygiene. Cleaning the interior is critical. It involves washing the padding and sanitizing the straps. Let’s dive into the steps to keep your helmet fresh.
Washing The Padding
The padding inside your helmet absorbs sweat and dirt. To wash the padding:
- Remove the padding from the helmet.
- Prepare a bowl with warm water and mild soap.
- Soak the padding in the soapy water for 10 minutes.
- Gently scrub the padding with a soft brush.
- Rinse the padding thoroughly with clean water.
- Allow the padding to air dry completely before reattaching.
Sanitizing The Straps
Helmet straps can harbor bacteria and odors. To sanitize the straps:
- Mix a solution of water and vinegar in a 1:1 ratio.
- Dip a clean cloth into the solution.
- Wipe down the straps thoroughly.
- Use a toothbrush to scrub any stubborn spots.
- Rinse the straps with clean water.
- Let the straps air dry completely.
By following these steps, you ensure your helmet stays clean and safe. Remember, a clean helmet not only feels good but also promotes better hygiene and longevity of the gear.

Credit: www.bikeroar.com
Drying The Helmet
Drying your bicycle helmet properly is essential to maintain its quality. A helmet that is not dried correctly can develop mold and bad odors. Follow these simple steps to ensure your helmet stays in the best condition.
Air Drying Techniques
Air drying is the best way to dry your helmet. Use a clean, dry towel to pat the helmet dry. Place the helmet in a well-ventilated area. Ensure good air circulation around the helmet. You can use a fan to speed up the process. Avoid using heat sources like hairdryers. Heat can damage the helmet’s materials.
Avoiding Direct Sunlight
Avoid direct sunlight when drying your helmet. UV rays can weaken the helmet’s structure. Place the helmet in a shaded area. If outdoors, find a spot with indirect sunlight. This will help in drying without damaging the helmet. Always check the helmet for any signs of wear after drying.
Quick Tips:
- Use a fan to speed up drying.
- Pat dry with a clean towel.
- Keep the helmet in a shaded area.
| Do | Don’t |
|---|---|
| Use a fan | Use a hairdryer |
| Pat dry with a towel | Expose to direct sunlight |
Reassembling The Helmet
After cleaning your bicycle helmet, reassembling it correctly is crucial. Proper reassembly ensures your safety during rides. Follow these steps to make sure everything is back in place.
Reattaching Accessories
Start by reattaching any removable accessories. These might include visors, padding, or light mounts. Ensure each piece clicks or snaps securely.
| Accessory | Attachment Method |
|---|---|
| Visor | Snap or clip into place |
| Padding | Velcro or button attachment |
| Light Mounts | Clip or strap on |
Final Inspection
Perform a final inspection before using your helmet again. Check the following:
- Straps are secure and not twisted
- Buckles are fastened properly
- Pads are firmly attached
- Exterior shell is free from cracks
Testing the helmet’s fit is also important. Make sure it sits snugly on your head. Adjust the straps if needed for a comfortable fit.
- Place the helmet on your head
- Buckle the chin strap
- Adjust the side straps
- Ensure a snug fit
A well-reassembled helmet keeps you safe and comfortable. Enjoy your ride knowing your helmet is in top condition.

Credit: www.youtube.com
Maintenance Tips
Keeping your bicycle helmet clean is essential for safety and comfort. Proper maintenance can extend its life and ensure it offers the protection you need. Below are some tips to help you maintain your helmet effectively.
Regular Cleaning Schedule
Set up a regular cleaning schedule for your helmet. Clean it every two weeks if you ride daily. This keeps it free from dirt, sweat, and bacteria.
Use mild soap and water. Avoid harsh chemicals that can damage the helmet. Gently scrub the exterior and interior padding with a soft cloth or brush.
- Remove the padding if possible and wash separately.
- Let everything air dry completely before reassembling.
Regular cleaning helps maintain the helmet’s integrity and ensures it stays fresh.
Proper Storage
Proper storage is crucial for helmet longevity. Store your helmet in a cool, dry place. Avoid leaving it in direct sunlight, as UV rays can weaken the materials.
Use a helmet bag for added protection. This keeps dust and dirt away and prevents accidental scratches.
| Storage Tip | Benefit |
|---|---|
| Cool, dry place | Prevents material degradation |
| Helmet bag | Protects from dust and scratches |
Never hang your helmet by its straps. This can cause them to stretch and lose effectiveness over time.
Following these maintenance tips can help keep your bicycle helmet in top condition. This ensures it provides the best protection whenever you ride.
Frequently Asked Questions
How Often Should I Clean My Bicycle Helmet?
You should clean your bicycle helmet every month. Regular cleaning maintains hygiene and extends the helmet’s life.
What Materials Do I Need To Clean A Helmet?
You need mild soap, water, a soft cloth, and a toothbrush. Avoid harsh chemicals.
Can I Wash My Helmet In A Washing Machine?
No, washing machines can damage the helmet. Always clean it by hand using mild soap and water.
How Do I Clean The Helmet Straps?
Use a soft cloth and mild soap to clean the straps. Rinse them thoroughly with water.
Conclusion
Cleaning your bicycle helmet is simple yet vital for safety. Regular maintenance ensures longevity and hygiene. Follow these easy steps to keep your helmet in top condition. Remember, a clean helmet is crucial for your riding experience. Invest a little time to protect your head and enjoy safer rides.


