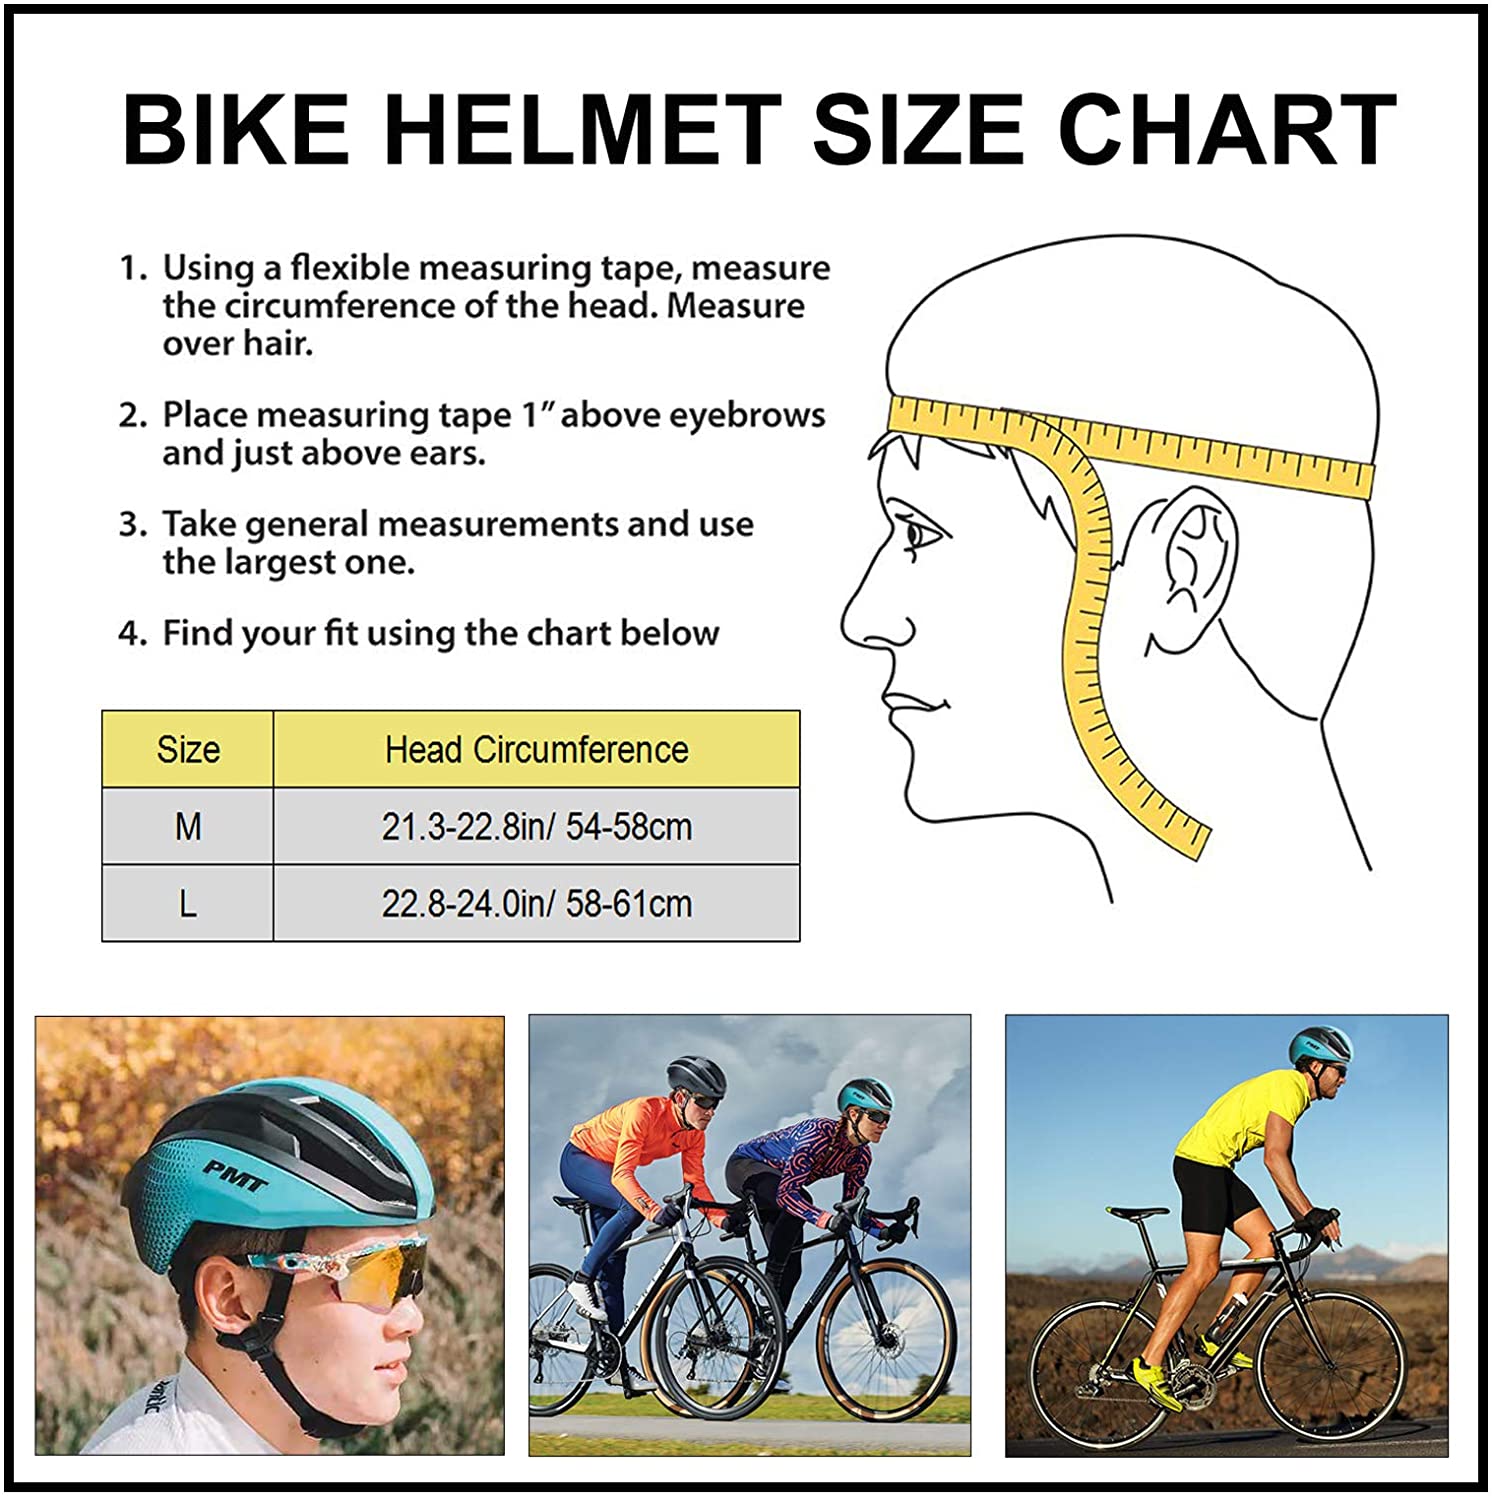
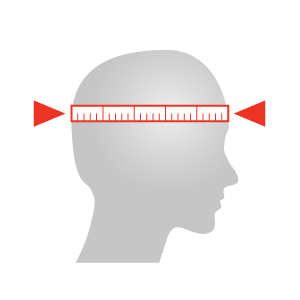
To measure for a bicycle helmet, wrap a soft measuring tape around your head, just above your eyebrows. Record the measurement in centimeters or inches.
Choosing the right bicycle helmet is crucial for safety and comfort. A well-fitted helmet protects your head during falls and accidents. Proper measurement ensures you select the correct size, enhancing both safety and fit. Use a soft measuring tape to measure the circumference of your head, just above the eyebrows and ears.
This measurement helps in selecting the right helmet size. Always double-check the manufacturer’s size chart, as sizing can vary. An accurately measured helmet provides optimal protection, making your rides safer and more enjoyable.

Credit: lazersport.us
Introduction To Helmet Safety
Ensuring a proper fit for a bicycle helmet enhances safety. Measure your head’s circumference just above the eyebrows. Choose a helmet that matches your measurement for optimal protection.
Wearing a helmet is important for every cyclist. It protects your head during falls and accidents. Understanding how to measure for a bicycle helmet ensures a proper fit. This can save your life in critical situations. Let’s explore why a proper fit is crucial and the risks of poor fit.Importance Of Proper Fit
A helmet that fits well provides maximum protection. Here are some benefits of a proper fit:- Enhanced Safety: A snug helmet absorbs impact better.
- Comfort: A well-fitted helmet feels comfortable on long rides.
- Stability: A proper fit keeps the helmet in place during movement.
Common Risks Of Poor Fit
Wearing a poorly fitted helmet can be dangerous. Below are some risks associated with a poor fit:| Risk | Description |
|---|---|
| Reduced Protection | A loose helmet may not protect during impacts. |
| Discomfort | An ill-fitting helmet can cause headaches and irritation. |
| Instability | A wobbly helmet may distract and hinder safe riding. |
Measuring Your Head
Before buying a bicycle helmet, it’s crucial to measure your head. A proper fit ensures safety and comfort. Follow these simple steps to measure your head correctly.
Tools Needed
You will need a few basic tools to get started:
- Flexible measuring tape
- Mirror or a helper
- Notepad and pen
Finding Your Head Circumference
Follow these steps to find your head circumference:
- Wrap the flexible measuring tape around your head.
- Position the tape just above your eyebrows.
- Make sure the tape is level all the way around.
- Use a mirror to check the tape’s position.
- Read the measurement in centimeters or inches.
- Write down the measurement on your notepad.
Here’s a quick reference table for head sizes:
| Size | Head Circumference (cm) | Head Circumference (inches) |
|---|---|---|
| Small | 51-55 | 20-21.75 |
| Medium | 55-59 | 21.75-23.25 |
| Large | 59-63 | 23.25-24.75 |
Choosing the correct helmet size is essential for your safety. Ensure the tape is snug but not tight. Double-check your measurement if unsure. A well-fitted helmet will provide the best protection.
Understanding Helmet Sizes
Finding the right bicycle helmet size is crucial for safety. An ill-fitting helmet can lead to accidents. Understanding helmet sizes will help you choose the best fit. This section will guide you through the process.
Size Charts Explained
Most bicycle helmets come with size charts. These charts match head circumference with helmet sizes. Here is a simple table to explain:
| Head Circumference (cm) | Helmet Size |
|---|---|
| 51-55 | Small |
| 55-59 | Medium |
| 59-63 | Large |
To measure your head, use a flexible tape measure. Wrap it around your head, just above your eyebrows. Write down the measurement in centimeters.
Adjusting For Different Brands
Helmet sizes can vary between brands. A medium size in one brand might differ in another. Here are steps to adjust for different brands:
- Check the brand’s specific size chart.
- Measure your head circumference again.
- Compare your measurement with the brand’s chart.
- Try on the helmet if possible.
Some brands offer adjustable fittings. Look for helmets with adjustable straps and dials. These features can help you find a secure fit.
Always ensure the helmet sits level on your head. The front should cover your forehead. There should be no gaps between your head and the helmet.

Credit: www.nutcasehelmets.com
Trying On The Helmet
Finding the right fit for your bicycle helmet is crucial for safety. Trying on the helmet helps ensure maximum protection and comfort. Follow these steps to make sure your helmet fits perfectly.
Initial Fit Check
Place the helmet on your head. It should sit level, covering your forehead. The front edge should be about an inch above your eyebrows. Shake your head gently. The helmet should stay in place. If it moves, try a different size.
Key Points:
- The helmet should sit level.
- It should cover your forehead.
- Ensure it stays in place when you shake your head.
Adjusting Straps And Pads
Adjust the side straps to form a “V” shape under your ears. The slider should sit just below your earlobes. Tighten the chin strap. You should be able to fit one finger between the strap and your chin. The buckle should be centered under your chin.
Key Points:
- Side straps should form a “V” under your ears.
- The slider should sit below your earlobes.
- Tighten the chin strap to fit one finger between strap and chin.
Most helmets come with extra pads. Use these pads to ensure a snug fit. Place them inside the helmet where needed.
Tip: A well-adjusted helmet should feel snug but not tight. You should feel comfortable and secure.
Ensuring A Secure Fit
Wearing a bicycle helmet properly is crucial for safety. A secure fit ensures maximum protection. This section will guide you on how to achieve a secure fit.
Tilt Test
First, place the helmet on your head. The helmet should sit level, with the front edge one inch above your eyebrows. Perform a tilt test to check for a secure fit.
- Look down: The helmet should not slide forward.
- Look up: The helmet should not slide backward.
Side-to-side Movement
Next, test for side-to-side movement. Move your head side-to-side while wearing the helmet.
- The helmet should not shift more than an inch.
- If it does, tighten the straps.
- Ensure the side straps form a “V” shape under your ears.
Follow these steps to ensure your helmet fits securely. A proper fit can protect you better in case of an accident.

Credit: www.cxwxc.com
Special Considerations
When measuring for a bicycle helmet, there are some special considerations to keep in mind. Different factors like age and activity type can impact the fit and safety of your helmet. Let’s explore these considerations further.
Children’s Helmets
Children need helmets that are specifically designed for their smaller heads. Measure the circumference of the child’s head. Use a flexible tape measure just above the eyebrows. Ensure the helmet fits snugly without being too tight. Look for helmets with adjustable straps and padding. These features help customize the fit as the child grows.
Here are some key points to consider:
- Check the helmet’s weight. Lighter helmets are more comfortable.
- Ensure the helmet has a safety certification label.
- Choose a helmet with bright colors for better visibility.
Helmets For Different Activities
Different activities require different types of helmets. A helmet for mountain biking may differ from a road cycling helmet. Each type is designed to provide protection for specific risks.
| Activity | Helmet Type | Special Features |
|---|---|---|
| Road Cycling | Road Helmet | Lightweight, aerodynamic |
| Mountain Biking | MTB Helmet | Extra coverage, visor |
| BMX | BMX Helmet | Full face, sturdy |
Here’s how to measure for different activity helmets:
- Measure the head circumference using a tape measure.
- Refer to the manufacturer’s size chart.
- Try on the helmet to check the fit.
Always ensure the helmet is suitable for the specific activity. This ensures maximum protection and comfort.
Maintenance And Replacement
Keeping your bicycle helmet in good condition is important. Regular maintenance and timely replacement ensure your safety. Below, we’ll discuss when to replace your helmet and how to properly care for and store it.
When To Replace Your Helmet
A helmet should be replaced after any crash. Even if it looks fine, the internal structure could be damaged. Most manufacturers recommend replacing helmets every 3-5 years. Over time, materials can degrade and offer less protection.
- After a crash
- Every 3-5 years
- If there are visible cracks or damage
Regular inspections are crucial. Look for cracks, worn straps, and broken buckles. If any part is damaged, replace the helmet immediately. A helmet with missing parts won’t protect you properly.
Proper Care And Storage
Keeping your helmet clean and stored correctly extends its life. Use a mild soap and water to clean it. Avoid using harsh chemicals as they can weaken the helmet’s material.
- Clean with mild soap and water
- Air dry, avoid direct sunlight
- Store in a cool, dry place
Store your helmet in a cool, dry place away from direct sunlight. Extreme heat and cold can damage the materials. Hanging your helmet on a hook or placing it on a shelf works well.
Never leave your helmet in a car. The heat inside can cause it to degrade faster. Always ensure it is dry before storing to prevent mold and mildew growth.
Additional Safety Tips
After you’ve measured and chosen the right bicycle helmet, follow additional safety tips. These tips ensure maximum protection and comfort during your rides.
Helmet Use In Different Weather
Weather conditions can affect helmet performance. During hot weather, ensure your helmet has proper ventilation. This keeps your head cool and prevents excessive sweating.
In cold weather, consider wearing a thin hat under your helmet. Make sure it does not affect the fit. Rainy weather can make surfaces slippery. Choose a helmet with a visor to keep rain out of your eyes.
Importance Of Consistent Use
Always wear your helmet, even on short rides. This habit can save your life. Consistency helps in building a routine. It ensures you never forget your helmet. Make sure your helmet fits properly every time you wear it.
Inspect your helmet regularly for any damage. Replace it immediately if you find any cracks or dents. Never use a damaged helmet. It may not provide the necessary protection.
Frequently Asked Questions
How Do I Measure My Head For A Bike Helmet?
Use a flexible tape measure around your head. Measure about one inch above your eyebrows. Ensure the tape is level.
What Size Helmet Should I Get?
Refer to the helmet sizing chart of the brand. Match your head measurement to the corresponding size.
Can I Use A String To Measure My Head?
Yes, you can use a string. Wrap it around your head, mark it, and measure it with a ruler.
How Tight Should A Bicycle Helmet Fit?
A helmet should be snug but comfortable. It shouldn’t move when you shake your head.
Conclusion
Measuring for a bicycle helmet ensures safety and comfort. Follow the steps outlined to find your perfect fit. Proper measurement helps prevent injuries and enhances your riding experience. Always double-check your measurements and try on helmets before purchasing. Safety is paramount, so take the time to measure accurately and choose wisely.

